
Jamie Oliver’s Victoria Sponge Recipe
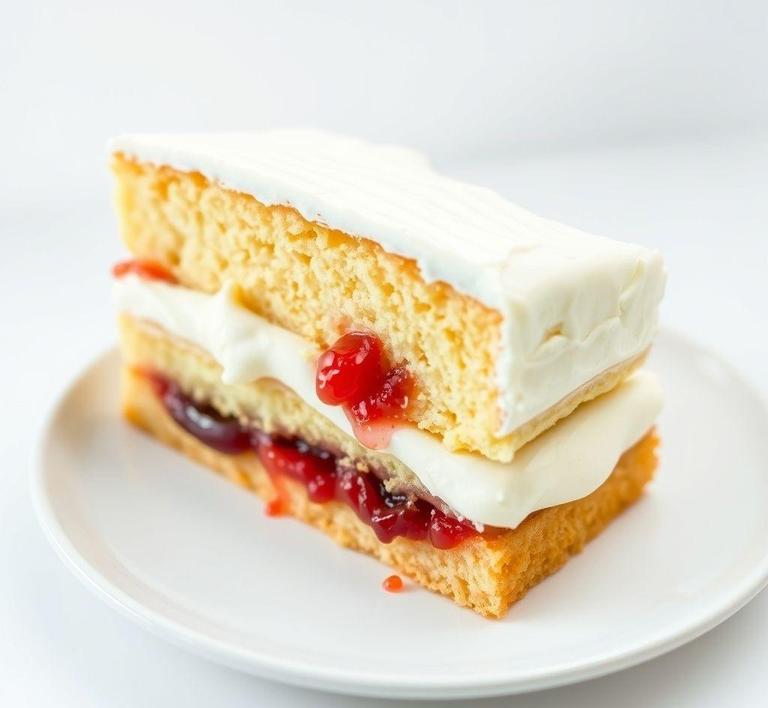
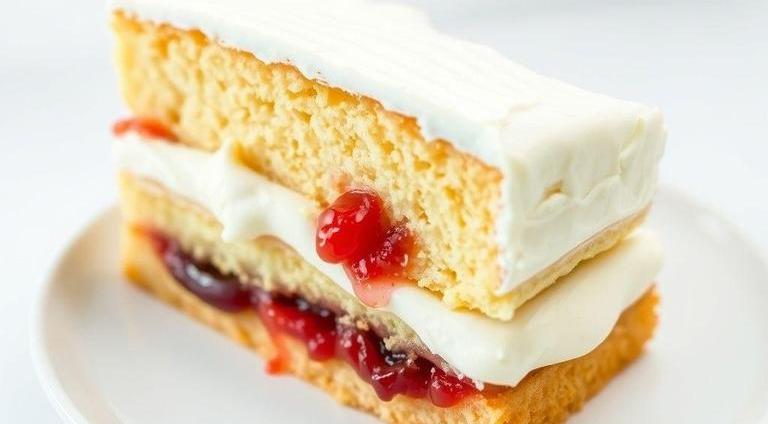
Jamie Oliver’s Victoria Sponge is a delightful, easy-to-make classic dessert that balances light and fluffy sponge layers with the perfect combination of jam and cream. It’s a guaranteed crowd-pleaser, ideal for afternoon teas, birthdays, or any celebratory occasion.
What Is Jamie Oliver’s Victoria Sponge
Jamie Oliver’s Victoria Sponge recipe takes the traditional British cake and elevates it with simple yet high-quality ingredients. This sponge cake is soft, buttery, and moist, often filled with jam and whipped cream or buttercream.
It was named after Queen Victoria, who was known to enjoy a slice of this cake with her afternoon tea. Jamie’s version sticks to the basics but gives you that perfect, airy texture and deliciously smooth jam-and-cream filling that has made the Victoria Sponge a staple in British kitchens for generations.
Jamie Oliver’s Victoria Sponge Recipe
Ingredients Needed
For the sponge:
- 200g unsalted butter, softened
- 200g caster sugar
- 4 large eggs
- 200g self-raising flour
- 1 tsp baking powder
- 1 tsp vanilla extract
- 2 tbsp milk (for a lighter batter)
For the filling:
- 100g raspberry or strawberry jam (you can use your favorite flavor)
- 200ml double cream, whipped (or you can opt for buttercream if preferred)
- Icing sugar (for dusting on top)
Equipment Needed
- 2 x 20cm round cake tins (lined with parchment paper)
- Electric hand whisk or stand mixer (for faster and fluffier results)
- Mixing bowl
- Spatula or spoon (for folding ingredients)
- Cooling rack (to let the cake layers cool evenly)
- Knife or spatula (for spreading jam and cream)
- Sieve (for dusting the cake with icing sugar)
- Measuring spoons and scales
How To Make Jamie Oliver’s Victoria Sponge?
Step 1: Prepare Your Oven And Tins
Preheat the oven to 180°C (fan 160°C), or 350°F. Grease and line the cake tins with parchment paper to ensure your cake layers come out smoothly after baking.
Step 2: Cream The Butter And Sugar
In a large mixing bowl, cream together the softened butter and caster sugar until light and fluffy. This step is crucial for a light texture, so take your time to beat the mixture well.
Step 3: Add The Eggs
Add the eggs one at a time, beating well between each addition. This helps the eggs to incorporate smoothly into the batter without curdling.
Step 4: Sift And Add Dry Ingredients
Sift the self-raising flour and baking powder into the bowl to avoid lumps, and fold gently into the butter mixture. Add the vanilla extract and a splash of milk to achieve a smooth, spoonable batter.
Step 5: Bake The Cake Layers
Divide the batter evenly between the prepared cake tins. Level the tops with a spatula and bake in the oven for 20-25 minutes, or until the cakes are golden brown and a skewer inserted into the center comes out clean.
Step 6: Cool The Cakes
Once baked, remove the cakes from the oven and allow them to cool in the tins for 5 minutes. Then, turn them out onto a wire rack to cool completely.
Step 7: Assemble The Cake
Once the cakes have completely cooled, spread a generous layer of jam on the bottom layer. Then, whip the double cream to stiff peaks and spread it over the jam. Place the second cake layer on top.
Step 8: Finishing Touches
Dust the top of the cake with icing sugar before serving. You can also add a few fresh berries for a bit of color and freshness if desired.
Expert Tips
- Butter Quality Matters: Using high-quality, unsalted butter will give the cake a richer, smoother flavor. Avoid margarine for a fluffier sponge texture.
- Don’t Overmix the Batter: Overmixing can lead to dense cakes. Mix the batter just enough to incorporate the dry ingredients with the wet ones.
- Room Temperature Eggs: Use eggs at room temperature to help them blend into the batter more easily, leading to a lighter cake.
- Cool Before Assembling: Let the sponge cakes cool completely before adding the jam and cream, as warm cakes can cause the filling to melt and ooze out.
- Jam Choices: While raspberry and strawberry are the classic fillings, feel free to experiment with other flavors like apricot or plum to match your personal taste.
- Texture Check: To ensure the cake is done, lightly press on the top of the cake. It should spring back up. If it leaves an indentation, it needs a little more time in the oven.
Jamie Oliver’s Victoria Sponge is the epitome of a simple yet utterly satisfying dessert. With just a few basic ingredients, you can create a stunning cake that’s sure to impress your guests.
The combination of light sponge, smooth jam, and whipped cream offers the perfect texture and flavor balance. Whether you’re making it for a special occasion or just as a treat for yourself, this cake is bound to bring joy to any table. Try it out and discover why the Victoria Sponge has earned its place as a beloved classic in British baking!.
Easy Recipe Variations For Jamie Oliver’s Victoria Sponge
Jamie Oliver’s Victoria Sponge recipe is a classic favorite, but there are plenty of ways to adapt it for different tastes, dietary needs, or to bring a bit of excitement to the table. Below are a few easy recipe variations you can try:
- Flavored Victoria Sponge: For a twist on the traditional flavor, try adding a teaspoon of lemon zest, orange zest, or even vanilla extract to the batter. These subtle changes will give the sponge a refreshing fragrance and enhance the overall flavor. For a chocolate version, consider adding 2-3 tablespoons of cocoa powder to the flour to make a rich, dark chocolate sponge.
- Berry-Inspired: While traditional Victoria Sponge uses strawberry jam, you can easily swap it out for different types of fruit preserves or fresh berries. Try raspberry jam, blackcurrant, or a mix of berries. Alternatively, for a more indulgent take, you can add fresh whipped cream to the layers along with your fruit.
- Gluten-Free Variation: If you need a gluten-free option, you can use a gluten-free flour blend to replace regular flour. Make sure you add a little xanthan gum or a similar binding agent to help the cake hold together. To add moisture, use ground almonds in place of some of the flour.
- Vegan Version: You can make a dairy-free and egg-free Victoria Sponge by swapping butter for vegan margarine or coconut oil and using a plant-based milk (such as almond milk or oat milk) instead of cow’s milk. For eggs, flax eggs (1 tablespoon ground flaxseeds + 2.5 tablespoons water per egg) work as a great replacement.
- Coconut Variation: Add 50g of desiccated coconut to the batter for a tropical touch. You can also replace the jam filling with coconut cream, making this a wonderfully fragrant, coconutty treat.
- Coffee Victoria Sponge: If you’re a coffee lover, try incorporating 1-2 teaspoons of instant coffee into the batter, which will infuse a subtle, rich coffee flavor. To complement this, you can add a coffee-flavored buttercream between the layers, and top with a dusting of cocoa powder.
Each of these variations will keep the essence of the beloved Victoria Sponge intact while offering a unique twist to suit your preferences.
Best Practices To Store Leftovers
Victoria Sponge is a delicious, moist cake, and it’s understandable that you might want to savor it for later. Here are the best ways to store your leftovers so that they stay fresh:
- Room Temperature Storage: If you plan to eat the leftovers within a couple of days, it’s perfectly fine to store the Victoria Sponge at room temperature. Place it in an airtight container to prevent it from drying out. It will keep well for 2-3 days, but be sure to consume it quickly to retain its moistness.
- Refrigeration: If you have added fresh cream, whipped cream, or any perishable fillings, it’s best to store the cake in the fridge. Wrap it tightly in plastic wrap or place it in an airtight container to avoid the sponge absorbing any unwanted odors from the fridge. The cake will stay fresh for about 3-4 days.
- Freezing: If you want to keep the cake for a longer period, freezing is a great option. Slice the cake into portions and wrap each slice tightly in plastic wrap, followed by aluminum foil. Place the wrapped portions in a freezer-safe bag or container. When you’re ready to enjoy it, simply thaw it at room temperature for 2-3 hours or in the fridge overnight. For best results, freeze the cake without the jam and cream filling, and add them fresh when you’re ready to serve.
- Reheating: To bring back some of the original moistness, you can gently reheat the sponge in the microwave for 10-15 seconds. However, this is more effective when the cake has been stored in the fridge, as room temperature storage will cause the sponge to become slightly dry.
By following these tips, your Victoria Sponge will stay fresh and delicious, ensuring you can enjoy it for days to come!
What Goes Well With Victoria Sponge?
Victoria Sponge is delightful on its own, but it can be elevated further with the right accompaniments. Here are a few options that pair wonderfully with this classic cake:
- Fresh Berries: Since the traditional Victoria Sponge is often paired with jam or fresh fruit, adding fresh berries such as raspberries, strawberries, or blackberries can make the dessert even more refreshing. A small handful of berries on the side or placed on top can enhance the flavor and presentation.
- Clotted Cream or Whipped Cream: To complement the light sponge, a dollop of clotted cream or whipped cream is a must. Its rich texture and slight sweetness provide the perfect contrast to the lightness of the cake. You can even infuse the cream with vanilla or a hint of cinnamon for extra flavor.
- Tea or Coffee: Victoria Sponge pairs wonderfully with a warm cup of tea or coffee. A nice black tea, like Earl Grey or English Breakfast, provides a classic pairing, while a strong cup of coffee can complement the sweetness of the cake.
- Ice Cream: For an indulgent dessert, serve your Victoria Sponge with a scoop of vanilla ice cream or custard. The cold, creamy texture contrasts beautifully with the soft sponge.
- Lemon Curd: If you’re looking for a tart and tangy contrast to the sweetness of the cake, lemon curd is an excellent choice. You can serve a spoonful alongside each slice for a citrusy punch.
- Chocolate: A drizzle of melted chocolate or some chocolate shavings can elevate your Victoria Sponge if you’re a chocolate lover. The sweetness of the chocolate pairs surprisingly well with the soft, buttery sponge.
With these accompaniments, you can transform your Victoria Sponge into a decadent treat, perfect for special occasions or a delightful afternoon tea.
Conclusion
Jamie Oliver’s Victoria Sponge is a timeless dessert that offers plenty of room for creativity and adaptation. From easy recipe variations that cater to different tastes and dietary needs to simple yet effective methods for storing leftovers, this cake can easily fit into any occasion.
When paired with complementary sides such as fresh berries, whipped cream, or a hot cup of tea, it’s the perfect treat for any time of day. Whether you stick to the traditional recipe or experiment with your own twists, the Victoria Sponge is sure to remain a favorite in your kitchen. Happy baking!.
FAQs
What Are The Main Ingredients For Jamie Oliver’s Victoria Sponge?
The main ingredients for Jamie Oliver’s Victoria Sponge include self-raising flour, unsalted butter, caster sugar, eggs, vanilla extract, and a filling of jam (usually raspberry) and whipped double cream.
Can I Use Plain Flour Instead Of Self-raising Flour In This Recipe?
While self-raising flour is preferred because it provides the necessary lift, you can substitute plain flour by adding baking powder. Use 1 teaspoon of baking powder per 100g of plain flour to mimic the effect of self-raising flour.
How Long Should I Bake The Victoria Sponge?
Jamie Oliver recommends baking the Victoria Sponge for around 20 to 25 minutes at 180°C (350°F) in a preheated oven. The cake should be golden brown and spring back when lightly pressed.
Can I Make The Victoria Sponge Ahead Of Time?
Yes, you can make the Victoria Sponge ahead of time. Allow the sponge to cool completely, then store it in an airtight container for up to 2-3 days. You can also freeze the sponge layers for later use.
What Type Of Jam Is Best For A Victoria Sponge?
Traditionally, raspberry jam is used in a Victoria Sponge because of its tartness, which balances the sweetness of the cake. However, you can also use other jams like strawberry or apricot if you prefer.
How Can I Prevent The Victoria Sponge From Sinking In The Middle?
To avoid the sponge sinking, ensure that the ingredients are well mixed and that the batter is not overworked. Also, check that your oven is preheated to the correct temperature and avoid opening the door during baking.
Can I Make A Gluten-free Version Of Jamie Oliver’s Victoria Sponge?
Yes, you can make a gluten-free Victoria Sponge by replacing the self-raising flour with a gluten-free self-raising flour blend. Make sure to use gluten-free baking powder if needed and follow the rest of the recipe as usual.
What Should I Do If My Butter Is Too Cold To Mix With The Sugar?
If your butter is too cold, it can be difficult to cream with the sugar. To soften it, cut the butter into small cubes and leave it at room temperature for about 10-15 minutes. Alternatively, you can gently microwave it in short bursts (around 5 seconds each) until soft but not melted.
Can I Substitute The Double Cream With Whipped Cream?
Yes, you can substitute double cream with whipped cream, though double cream offers a richer and thicker texture. If using whipped cream, ensure it is well-whipped to avoid it losing its texture when spread on the cake.
How Do I Know When My Victoria Sponge Is Fully Baked?
A fully baked Victoria Sponge will be golden brown on top, and if you insert a skewer or toothpick into the center, it should come out clean. The sponge should also spring back when lightly pressed in the center.