
Jamie Oliver’s Plum Jam Recipe
Jamie Oliver’s Plum Jam offers a deliciously rich, sweet-tart spread with a perfect balance of fruity goodness that will elevate your morning toast or even your baked goods, all while being simple to make with fresh ingredients.
What Is Jamie Oliver’s Plum Jam
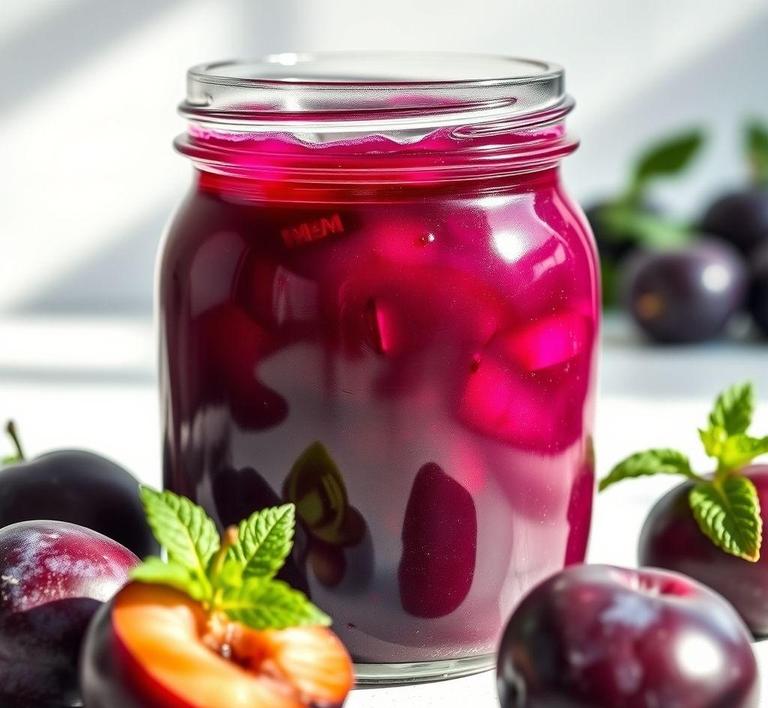
Jamie Oliver’s Plum Jam is a homemade fruit preserve made from plums, sugar, and a bit of lemon juice to give it the right balance of sweetness and tartness. The jam is known for its vibrant color, deep flavor, and smooth texture, making it a perfect accompaniment for a variety of dishes, from simple toast to luxurious tarts or pastries. This jam is a great example of how you can transform seasonal fruit into something that lasts and can be enjoyed year-round.
Jamie Oliver’s Plum Jam Recipe
Ingredients Needed
The ingredients for Jamie Oliver’s Plum Jam are straightforward, ensuring a delightful taste without being overly complicated:
- Plums (around 1 kg): The star ingredient, plums are the key source of sweetness and tartness. You can use any variety of ripe plums for a more personalized flavor.
- Sugar (750g): Granulated white sugar works best for a smooth jam texture and sweetness.
- Lemon juice (juice of 1 lemon): The acidity from lemon juice helps balance the sweetness of the plums and activates the pectin, which is crucial for the jam to set properly.
- Water (a splash): To help cook the fruit down into a soft consistency.
Equipment Needed
To make this jam, you don’t need any specialized equipment, just a few basic kitchen tools:
- Large heavy-bottomed saucepan or preserving pan: Essential for evenly cooking the fruit and sugar without burning.
- Wooden spoon: To stir the jam, ensuring that the sugar doesn’t stick to the pan and burn.
- Sterilized jam jars: For storing the jam once it’s made. Proper sterilization ensures that the jam stays fresh for longer.
- Ladle: For transferring the hot jam into the jars.
How To Make Jamie Oliver’s Plum Jam?
Making Jamie Oliver’s Plum Jam is a simple process, but it requires patience and attention to detail:
- Prepare the Plums: Begin by washing the plums, cutting them in half, and removing the pits. You can either leave the skin on for a richer flavor or peel them if you prefer a smoother jam.
- Cook the Fruit: Place the plums in a large saucepan with a splash of water and cook them over medium heat. Stir occasionally until the plums soften and break down into a pulp (about 10-15 minutes).
- Add Sugar and Lemon: Once the fruit has softened, add the sugar and lemon juice. Stir until the sugar is dissolved.
- Simmer and Stir: Bring the mixture to a boil, then lower the heat to a simmer. Allow the jam to cook for 40-50 minutes, stirring frequently. To test if the jam is set, place a small spoonful on a chilled plate. Run your finger through it, and if it wrinkles and holds its shape, it’s ready.
- Jar the Jam: Carefully ladle the hot jam into sterilized jars, ensuring they are filled to the top. Seal the jars immediately and let them cool.
- Store: Once the jars have cooled, store them in a cool, dark place. The jam should last for several months if sealed properly.
Expert Tips
- Use a Sugar Thermometer: If you want to get the perfect jam consistency, use a sugar thermometer. The jam is ready when it reaches 220°F (104°C).
- Sterilize the Jars: To keep the jam fresh for longer, sterilize your jars before filling them by boiling them for 10 minutes or running them through the dishwasher on the hot cycle.
- Test for Set: Don’t skip the “wrinkle test” to check the jam’s consistency. If you don’t have a thermometer, this is a reliable way to ensure your jam has reached the perfect thickness.
- Adjust Sweetness: Depending on the ripeness of the plums, you might want to adjust the sugar levels. Taste the fruit before adding sugar, and feel free to decrease or increase the sugar amount slightly.
- Add Flavor Variations: You can enhance the flavor by adding spices like cinnamon, vanilla, or ginger for a unique twist. You could also use a splash of brandy or rum to give the jam an adult twist.
Jamie Oliver’s Plum Jam is a fantastic way to preserve the beauty and flavor of ripe plums. It’s incredibly easy to make with just a few basic ingredients, and the result is a delicious, versatile jam that’s perfect for spreading on toast, dolloping on desserts, or gifting to loved ones.
Whether you’re new to making preserves or a seasoned pro, this recipe will undoubtedly become a staple in your kitchen. Happy jam-making!.
Easy Recipe Variations For Jamie Oliver’s Plum Jam
Jamie Oliver’s plum jam recipe is a wonderful way to capture the delicious taste of summer in a jar. But if you’re feeling a bit adventurous in the kitchen, there are several easy and creative variations you can try, giving your plum jam a fresh twist.
-
Spiced Plum Jam:
To give your plum jam an aromatic depth, add spices such as cinnamon, cloves, or star anise. These spices complement the sweetness of the plums and add warmth to the flavor. Add 1-2 cinnamon sticks and 3-4 whole cloves to the pot as the jam simmers. Remove the spices before transferring the jam to jars. -
Plum and Ginger Jam:
A zesty, warming combination of plums and ginger can turn an already delightful jam into something extraordinary. Simply grate a small piece of fresh ginger (about 1-2 teaspoons) and add it to the jam mixture. This will lend a sweet-spicy undertone that pairs beautifully with plums. -
Plum and Orange Marmalade Jam:
Bring some citrusy brightness into your plum jam by incorporating orange zest and juice. The tartness of the orange will balance the sweetness of the plums. Use the zest of one orange and 1/4 cup of freshly squeezed juice, adding them to the mix when the plums start breaking down. -
Plum and Vanilla Jam:
A delicate twist that uses vanilla beans for a soft, luxurious flavor. Scrape the seeds from one vanilla pod and add it to the simmering plums, or simply add a teaspoon of vanilla extract toward the end of the cooking process. -
Plum and Rosemary Jam:
For a more herbaceous flavor, rosemary pairs wonderfully with plums. Add a couple of sprigs of fresh rosemary to the mixture as the jam cooks. The herbal notes enhance the plum’s sweetness, creating a savory-sweet jam perfect for pairing with cheeses or grilled meats. -
Plum and Chili Jam:
If you love a bit of heat, you can add some fresh red chili to your plum jam. The spiciness creates a bold contrast to the sweet fruit, making it perfect as a condiment for cheese platters or roasted meats. Finely chop 1-2 fresh red chilies and stir them into the mix while the jam cooks.
These variations are easy to integrate, and each brings a unique flavor profile to your homemade plum jam. Feel free to experiment with different spices and fruits depending on what you have on hand!
Best Practices To Store Leftovers
Once you’ve crafted your plum jam, it’s important to store it properly to keep it fresh and delicious. Here are some best practices for storing your leftover plum jam:
- Seal it Tight: When canning or storing plum jam, always ensure the jars are tightly sealed. This prevents air from entering and causing spoilage. Use sterilized jars for the best results, as bacteria and mold can thrive in unsanitary conditions.
- Store in a Cool, Dark Place: Once you’ve sealed your jars, place them in a cool, dark location such as a pantry or cupboard. Heat and sunlight can degrade the jam’s quality and shelf life. A stable temperature of around 50-70°F (10-21°C) is ideal.
- Refrigerate After Opening: If you’re using a jar of jam that has already been opened, it’s crucial to refrigerate it to slow down the growth of mold and bacteria. After opening, the jam should last for up to 3-4 weeks in the fridge.
- Freeze for Long-Term Storage: If you made a large batch of plum jam and want to store some for later, freezing is a great option. Spoon the jam into freezer-safe containers or freezer bags, leaving about an inch of headspace for expansion. Frozen jam can last for up to a year. To thaw, simply transfer it to the fridge overnight.
- Label Your Jars: If you make several batches of plum jam with different variations, it’s helpful to label each jar with the date it was made and any flavor variations. This will help you keep track of freshness and prevent confusion.
By following these simple storage practices, you can enjoy your homemade plum jam for months to come, keeping its fresh, vibrant taste intact.
What Goes Well With Plum Jam?
Plum jam isn’t just for spreading on toast-its rich, fruity flavor can elevate a wide variety of dishes. Here are some ideas to pair with your plum jam:
- Cheese Platters: The sweet-tart nature of plum jam pairs beautifully with sharp cheeses. Try it with Brie, goat cheese, cheddar, or even blue cheese. The contrast of the creamy, savory cheeses with the sweet jam is simply irresistible.
- Yogurt or Oatmeal: Spoon some plum jam over a bowl of Greek yogurt or morning oatmeal for a burst of fruity sweetness. The thick, rich texture of the jam adds depth to the dish, making it more satisfying and flavorful.
- Grilled Meats: Plum jam works wonderfully as a glaze or condiment for grilled meats like pork, chicken, or duck. Its sweetness complements the charred flavors of the meat, adding a delightful balance. Try it on pork ribs or grilled chicken for an easy, flavorful twist.
- Baked Goods: Whether it’s in a fruit tart, Danish pastry, or as a filling for cakes and cookies, plum jam is perfect for adding a fruity punch to your baked goods. You can spread it between layers of sponge cake or use it as a filling for thumbprint cookies.
- Scones and Biscuits: For an afternoon tea, serve plum jam alongside freshly baked scones or biscuits. The combination of buttery, flaky scones with sweet jam and clotted cream is a classic British treat that never disappoints.
- Ice Cream or Sorbet: For a refreshing dessert, swirl some plum jam into vanilla ice cream or sorbet. It’s a great way to introduce a fruit-forward flavor and create a colorful, delicious dessert.
- Pancakes and Waffles: Spread plum jam over pancakes or waffles for a flavorful breakfast. The sweetness of the jam can complement butter and syrup for a satisfying, sweet start to your day.
Plum jam’s versatility makes it a great addition to many different meals and treats, providing a fruity balance that enhances a variety of flavors.
Conclusion
Jamie Oliver’s plum jam is a delightful, easy-to-make treat that adds a burst of fruity sweetness to your pantry. With simple recipe variations like spiced, vanilla, or even chili-infused versions, you can customize the jam to suit your personal taste.
Storing it properly ensures it lasts for months, so you can enjoy the flavor of plums even when they’re out of season. Whether you pair it with cheese, yogurt, grilled meats, or baked goods, plum jam is a versatile addition to a wide range of dishes. So go ahead, make a batch (or two), and get creative with how you use it!.
FAQs
What Ingredients Do I Need For Jamie Oliver’s Plum Jam?
To make Jamie Oliver’s plum jam, you will need plums (about 1kg), sugar (750g), lemon (1), and water (100ml). Optionally, you can add spices like cinnamon or star anise for extra flavor.
How Do I Prepare The Plums For Making Plum Jam?
Start by washing the plums, then cut them in half and remove the stones. You can leave the skin on, as it helps with the natural pectin content, which helps the jam set.
Can I Use Other Fruits To Make This Jam?
Yes, you can use other fruits like damsons, greengage plums, or even a mix of stone fruits. The recipe is flexible and can be adapted to suit the fruits in season.
What Type Of Sugar Should I Use For Plum Jam?
Jamie Oliver recommends using caster sugar for plum jam as it dissolves quickly, helping the jam set properly. Avoid using brown sugar, as it can alter the flavor and color of the jam.
How Do I Know When The Plum Jam Is Ready To Set?
To test if the jam is ready, place a spoonful on a cold plate and let it cool for a minute. Push the jam with your finger – if it wrinkles and doesn’t run, it’s ready. You can also use a sugar thermometer to check the temperature; it should reach 105°C (220°F).
How Long Should I Cook The Jam?
Cook the jam for about 30-40 minutes on medium heat, stirring occasionally. The time may vary depending on the ripeness of the plums and the size of your pot. Ensure you are continuously checking the consistency to avoid overcooking.
Do I Need To Sterilize Jars For The Jam?
Yes, sterilizing the jars is important to prevent contamination. You can sterilize jars by washing them in hot, soapy water and placing them in the oven at 160°C (320°F) for 15 minutes or by placing them in a dishwasher.
How Do I Store The Plum Jam Once It’s Made?
Once your plum jam is ready and the jars are sealed, store them in a cool, dark place. Properly sealed jars can last for up to a year. After opening, keep the jam in the refrigerator and consume it within a few months.
Can I Reduce The Sugar In Jamie Oliver’s Plum Jam Recipe?
While reducing sugar is possible, it may affect the jam’s setting ability and preservation. If you prefer a lower sugar content, you can experiment with using a jam sugar or a pectin-rich fruit mix, but be aware it may not last as long.
How Can I Add Extra Flavor To My Plum Jam?
You can infuse your plum jam with extra flavor by adding ingredients like vanilla, cinnamon, or even a splash of brandy or port. Add these after the jam has reached the setting point to avoid overpowering the plum taste.